Developing intuition in electronics is tough. Resistors, capacitors, inductors, and diodes are all tricky dudes (and dudettes), but I’m hoping this video incorporates enough nastiness to make learning it easier.
Heating Bed and Nozzle Simultaneously On CR-10 In Cura
On my CR-10, the nozzle heats up and then the bed heats up. This seems like a waste of time particularly in that I need to make sure the first layer of the print goes down correctly. After that, I don’t care. This sequentially heating dramatically increases my time investment in a print.
Warning: I’ve heard that the stock CR-10 power supply is trash and can’t handle this. I’ve been doing it for about a year (hundreds of prints) with no issue. Use at your own risk.
In Cura, go to Settings > Printer > Manage Printer > Machine Settings > Printer
———START G-CODE
M140 S{material_bed_temperature} ; start preheating the bed WITHOUT wait to what is set in Cura
M104 S{material_print_temperature} T0 ; start preheating hotend WITHOUT wait to what is set in Cura
M190 S{material_bed_temperature} ; start heating the bed to what is set in Cura and WAIT
M109 S{material_print_temperature} T0 ; start heating hotend to what is set in Cura and WAIT
M201 X500.00 Y500.00 Z100.00 E5000.00 ;Setup machine max acceleration
M203 X500.00 Y500.00 Z10.00 E50.00 ;Setup machine max feedrate
M204 P500.00 R1000.00 T500.00 ;Setup Print/Retract/Travel acceleration
M205 X8.00 Y8.00 Z0.40 E5.00 ;Setup Jerk
M220 S100 ;Reset Feedrate
M221 S100 ;Reset Flowrate
G28 ;Home
G92 E0 ;Reset Extruder
M92 E98 ; Brando configured extruder e-steps
G1 Z2.0 F3000 ;Move Z Axis up
G1 X10.1 Y20 Z0.28 F5000.0 ;Move to start position
G1 X10.1 Y200.0 Z0.28 F1500.0 E15 ;Draw the first line
G1 X10.4 Y200.0 Z0.28 F5000.0 ;Move to side a little
G1 X10.4 Y20 Z0.28 F1500.0 E30 ;Draw the second line
G92 E0 ;Reset Extruder
G1 Z2.0 F3000 ;Move Z Axis up
——— END G-CODE ————————–
G91 ;Relative positionning
G1 E-2 F2700 ;Retract a bit
G1 E-2 Z0.2 F2400 ;Retract and raise Z
G1 X5 Y5 F3000 ;Wipe out
G1 Z10 ;Raise Z more
G90 ;Absolute positionning
G1 X0 Y{machine_depth} ;Present print
M106 S0 ;Turn-off fan
M104 S0 ;Turn-off hotend
M140 S0 ;Turn-off bed
M84 X Y E ;Disable all steppers but Z
Before You Decide On Hand-Soldered 0603 Capacitors
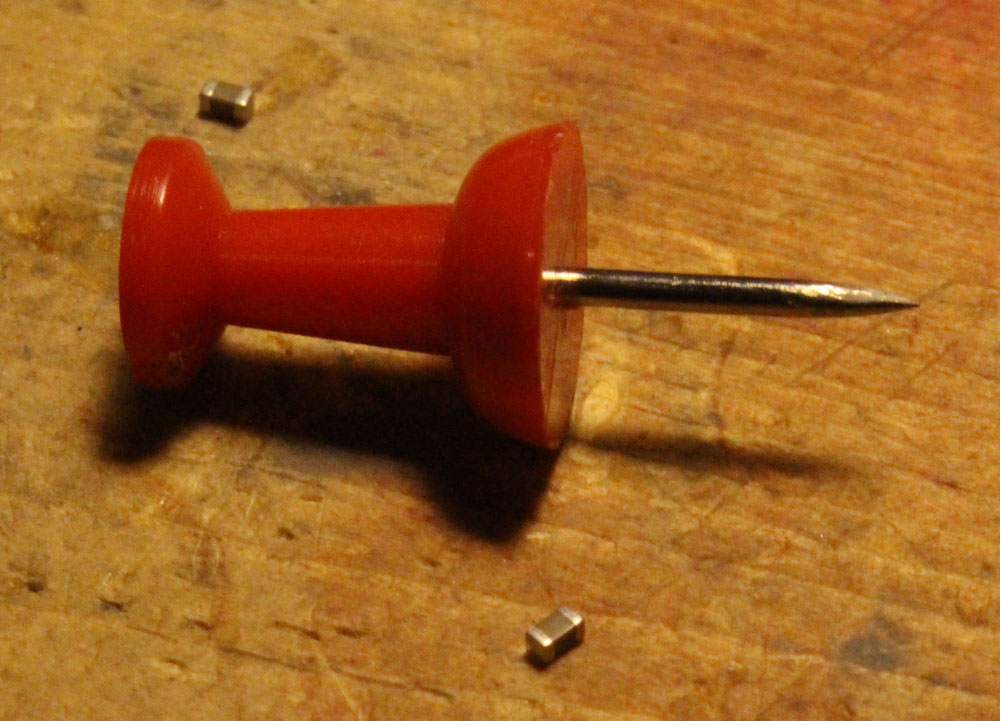
Before you decide to hand solder 0603 capacitors on your board……

Blue Pill STM32 Clones Brown Out or Become Unresponsive
The Problem: The STM32 Blue Pill sometimes dies for no apparent reason. On the PSU, it’s pulling 30mA and then for now apparent reason, the current draw reduces to 10mA (for the power indicator LED, presumably) and the microcontroller appears dead. It only seems to occur when powered from a power supply to the 5V pin. Once it occurs, giving the 3.3V pin power instead appears to do no good.
For some reason, I’ve been able to fix the problem reliability by removing external power and powering the STM32 via the Stlink clone along with the CLK, GND, and IO pins. Voltage SHOULD be voltage in such a situation, but maybe the IO pin has some kind of effect. I’m really not sure. If anyone knows, please pass on why.
I’ve wondered if the problem is some kind of BOR brownout problem, but I haven’t done the work to find out yet. It only seems to happen with the CS32F103C8T6 STM32 Blue Pill clones (which I currently have 9 of I need to burn through and never buy again.)
Engineering Rule #1: Make Friends With Iteration
Imagine you’re a young boy who worked hard all day on his sandcastle. Just as your mom calls you for dinner, a teenage jerk runs up and kicks your castle down. That feeling of loss, betrayal, and rage is only topped with the feeling that all that hard was for nothing.
This is every day. At least it’s most days. It’s the odd day that things go right the first try. To be honest, I kinda like it this way. I say that now because typing it is easy. Going back to the PCB I have to throw in the trash and start all over on is harder.
It’s a good idea for everyone involved with making and engineering to go ahead and make friends with iterating because you are going to be doing it from here on out. It is the way. There’s no way around it. You do. You fail. You repeat. In theory, it’s supposed to get easier somewhere along the line, but that’s only if you aren’t trying new things. As long as things are new, you will completely screw up on a perpetual basis.
This quick blog is my way of saying that this state of disaster is not only normal, it’s the correct path. The hard part is not beating yourself up. Yes, there are people that already goofed up whatever part of the path you are on and it’s easy to look around and think that you are the only one having problems. The truth is they probably had the same problem and they probably had the same problem more times than you did. Accept that you may have to solder up 3 boards on your needed project before you get one that works. Enjoy it.
Brandon

